Summary
This article explains how automated testing transforms web‑app development by enabling fast, repeatable, and reliable verification of functionality, performance, and stability — reducing bugs, speeding up release cycles, and improving overall software quality. It highlights benefits like early bug detection, broad test coverage, cross‑browser/device compatibility, and cost‑effective regression testing, making automated testing an essential part of modern web development.
Writing tests is a fundamental part of software development. While creating high-quality software solutions, testing helps minimize errors and reduce overall costs, especially when applied early. There are various types of software testing, and automated testing is one of them. Like any other tool, it has its pros and cons. Sometimes, all your efforts will result in wasted time and money. However, it can significantly improve the app’s stability when done right, resulting in better user satisfaction and increased ROI.
Today, we’ll consider how you can apply automated testing to web apps built with Webix. Our primary goal is to demonstrate the basics of using it in practice. To do this, we will start with a very simple test and smoothly move on to working with Webix widgets. It’s up to you to decide if this approach is worth your time.
Writing a Simple Test With Playwright
At XB Software, we’ve been working with the Webix UI library for almost ten years since its beta version was released. We used various testing tools at different times, including Selenium and Puppeteer. Lately, we mainly use Playwright for end-to-end (e2e) testing. One of the main reasons is that it allows us to work with Chromium, Firefox, or the WebKit web browser engine using a single API. Also, it supports all major operating systems, such as Windows, Linux, and MacOS. To show you how Playwright can be used for automated testing, we’ll use the Webix Admin App Demo:
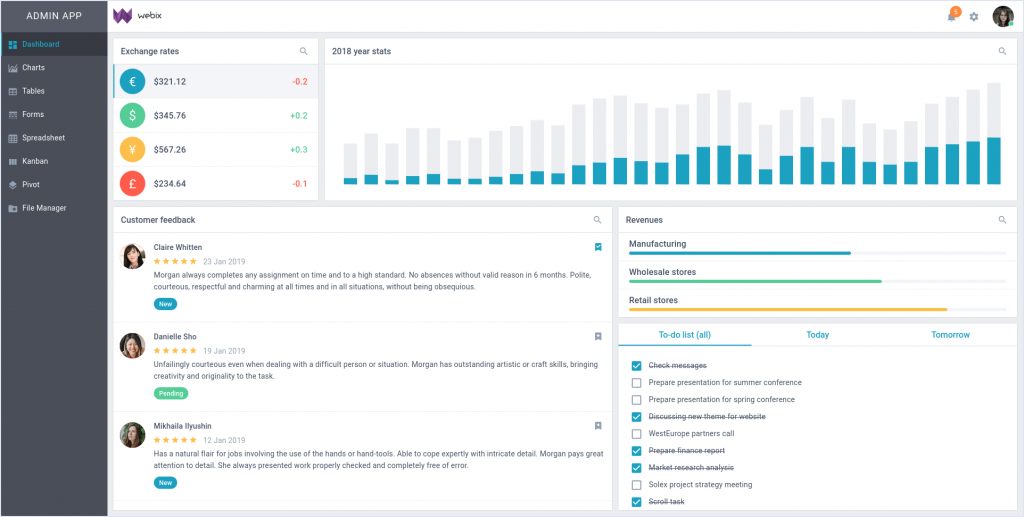
Source: Webix Admin App Demo
The demo is available on this GitHub page, where you can also find instructions for downloading and running it. After downloading the app, the next step is to install and initialize the Playwright test framework. You can do it using npm by running this command in your terminal:
|
1 |
npm init playwright@latest |
It’ll create the following files:
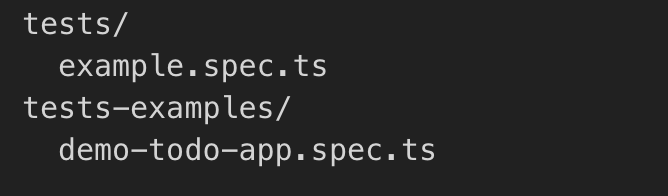
The test-examples folder contains a demo application for testing. What we need to focus on right now is the tests folder. Here, we’ll work on our e2e tests. First of all, let’s open the example.spec.ts file and import test environment variables:
|
1 |
const { test, expect } = require('@playwright/test'); |
Now, we are going to write our first test. Let’s start with something relatively simple. It’ll check the page’s name as shown in the browser tab. Run a local server for the demo application and use the following code:
|
1 2 3 4 |
test('has title', async ({ page }) => { await page.goto('http://localhost:8080/#!/main/dash'); await expect(page).toHaveTitle(/Webix Demo App/); }); |
Most tests should start with the URL address to ensure they can interact with page elements. Now, we can run the test using this command:
|
1 |
npx playwright test |
You should get the following result:

The last string shows a command you can run to get an HTML page containing the test report. In case some errors occur during the testing, the report will open in the browser automatically.
Read Also Why Software Testing Plays a Key Role in a High-Quality Software Product Development
Testing Multiple Page Elements at Once
Let’s see how we can work directly with Webix UI elements. The main page of our demo application has a navigation menu bar on the left. It allows users to switch between different app pages:

In our second test, we will check if all these menu items are clickable and if the mouse hover action works correctly. To find elements on the page, we’ll use the locator() method, passing the following selectors into it:
- .webix_sidebar, a CSS class related to the sidebar component;
- .webix_tree_item, a CSS class corresponding to the tree component element.
Next, we’ll use the all() method to get an array of all elements containing the above selectors. We can use the click() and hover() methods for each of these elements by iterating over the array’s contents. Here’s the resulting code:
|
1 2 3 4 5 6 7 |
test('dashboard', async ({ page }) => { await page.goto('http://localhost:8080/#!/main/dash'); for (const element of await page.locator('.webix_sidebar .webix_tree_item').all()) { await element.click() await element.hover() } }); |
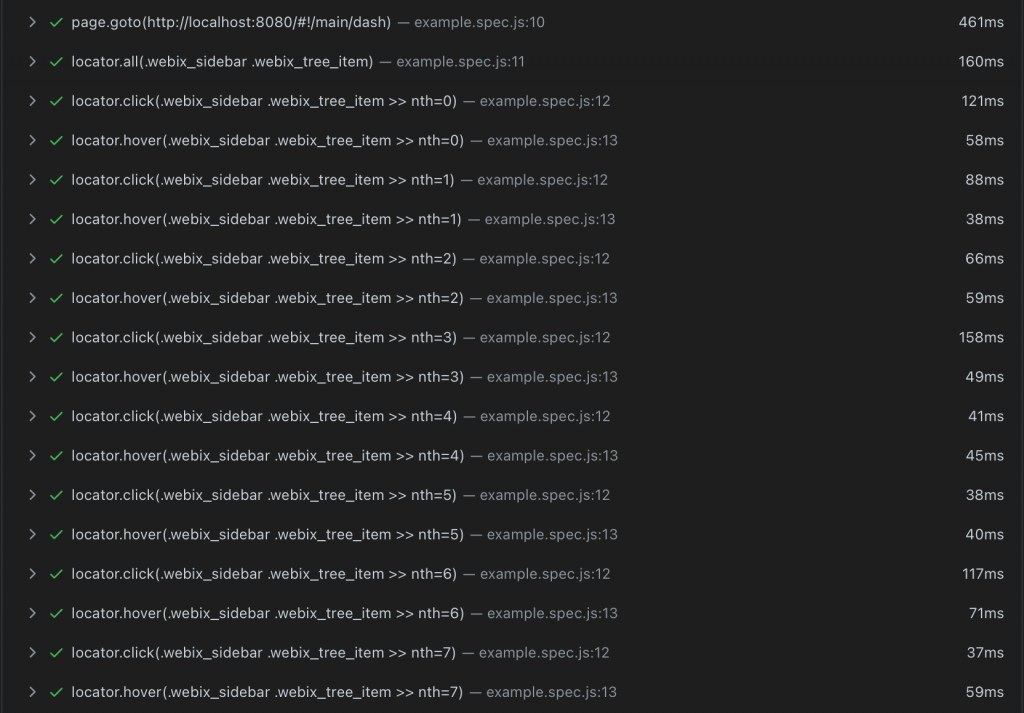
In the terminal, we can use the command that we’re already familiar with to run the test and check the results:

This time, we run more complex tests, so it makes sense to check the report. It’ll contain all tests we wrote for three different browser engines. For example, you can check the “dashboard” test report for Chromium. It shows that 8 menu items were found, each successfully tested for clickability and response to the mouse hover action:
Testing Forms And Options Selection Controls
Let’s get things more challenging and try to work with forms. Our third test will use the getByLabel() method to check whether the field on the Forms page can be filled:
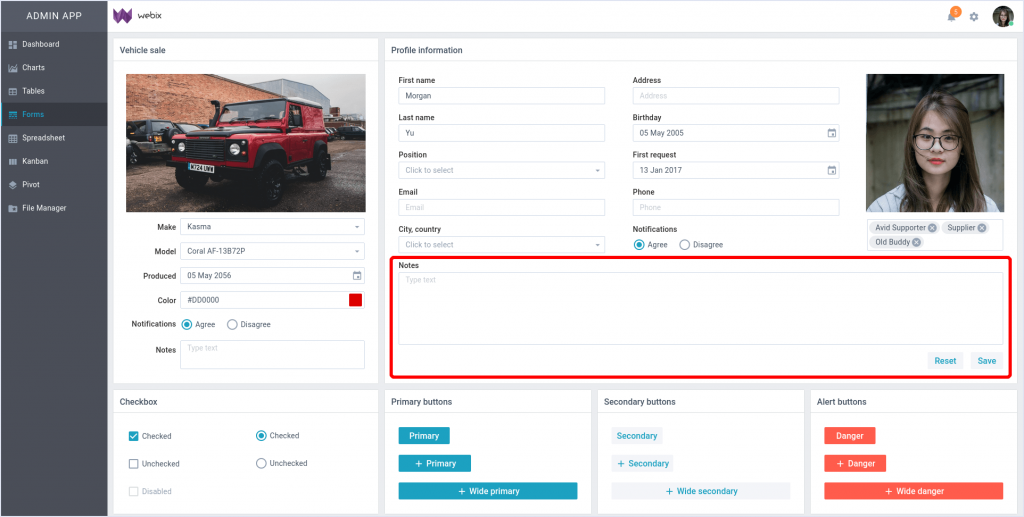
Here’s how we can find and fill the Notes field:
|
1 2 3 4 5 |
test('forms', async ({ page }) => { await page.goto('http://localhost:8080/#!/main/forms'); for (const elem of await page.getByLabel('Notes').all()) await elem.fill('some text') }); |
The fourth test works with the Tables page. It implements the scenario of opening the app in Chromium and selecting an element in RichSelect to filter the contents of the bottom right table. Also, it makes screenshots of the page before and after applying filters. For this purpose, we can use the screenshot() method:
|
1 2 3 4 5 6 7 8 9 10 11 |
(async () => { const browser = await chromium.launch(); const context = await browser.newContext(); const page = await context.newPage(); await page.goto('http://localhost:8080/#!/main/tables'); await page.screenshot({ path: 'testScreenshots/tablesScreenshotPrev.png' }); await page.getByRole('combobox').click(); await page.getByRole('option', { name: 'Dashboard' }).click(); await page.screenshot({ path: 'testScreenshots/tablesScreenshotNext.png' }); })(); |
After we run the test, a new folder named testScreenshots will be created in the project folder. Inside, you’ll find two screenshots with the names we set in the code earlier, namely tablesScreenshotPrev.png and tablesScreenshotNext.png. We can compare them to check if the app works correctly:
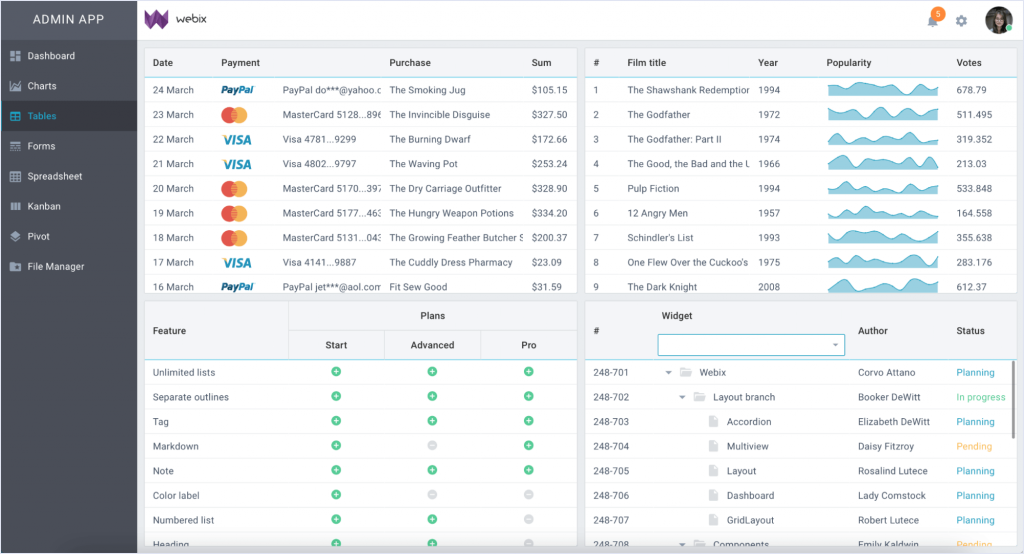
Table before applying filters
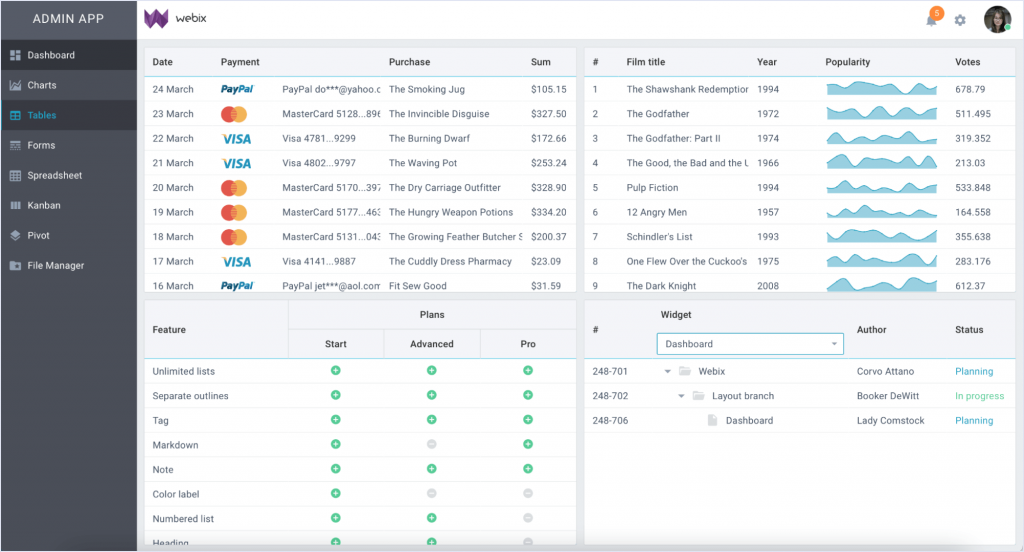
Table filtered by given value
Lastly, the fifth test returns us to the Forms page. Here, we’ll check how adding and removing items works with the Multicombo control. Also, we’ll test if changing data in Combo and Textarea controls works correctly:
|
1 2 3 4 5 6 7 8 9 10 11 12 13 14 15 16 17 18 19 20 21 22 23 24 25 26 27 28 29 30 31 32 33 |
(async () => { const browser = await chromium.launch(); const context = await browser.newContext(); const page = await context.newPage(); await page.goto('http://localhost:8080/#!/main/forms'); await page.screenshot({ path: 'testScreenshots/formsScreenshotPrev.png' }); // remove items (Old Buddy, Supplier, Avid Supporter) under girl's photo await page.getByRole('listitem').filter({ hasText: 'Old Buddy' }).getByRole('button', { name: 'Remove item' }).click(); await page.getByRole('listitem').filter({ hasText: 'Supplier' }).getByRole('button', { name: 'Remove item' }).click(); await page.getByRole('listitem').filter({ hasText: 'Avid Supporter' }).getByRole('button', { name: 'Remove item' }).click(); await page.getByPlaceholder('Click to add tags').click(); // add the item Customer under girl's photo await page.getByRole('option', { name: 'Customer' }).getByRole('checkbox').click(); // fill in the Notes field for (const elem of await page.getByLabel('Notes').all()) await elem.fill('some text') // fill in the Birthday field await page.getByRole('combobox', { name: 'Birthday' }).click(); await page.getByText('16').click(); // fill in the Email field await page.getByPlaceholder('Email').click(); await page.getByPlaceholder('Email').fill('s@gmail.com'); // select the new car Typhon&Co await page.getByRole('combobox', { name: 'Make' }).click(); await page.getByRole('option', { name: 'Typhon&Co' }).click(); // select the new color #000000 await page.getByRole('combobox', { name: 'Color' }).click(); await page.getByRole('gridcell', { name: '#000000' }).locator('div').click(); // select the new model Pytheas RY-1M4L1VE await page.getByRole('combobox', { name: 'Model' }).click(); await page.getByRole('option', { name: 'Pytheas RY-1M4L1VE' }).click(); await page.screenshot({ path: 'testScreenshots/formsScreenshotNext.png' }); })(); |
After we run this test, we’ll get screenshots named formsScreenshotPrev.png and formsScreenshotNext.png, which will help us ensure the app functionality is correct.
Conclusions
Webix provides access to a few dozen simple widgets. On their basis, a wide variety of complex widgets are built, including File Manager, Scheduler, Pivot, etc. Despite such diversity, you can use a single approach to writing automated tests. Today, we covered the basic principles of testing Webix apps using a demo built with such widgets as Form, Menu, DataTable, Checkbox, DataPicker, Toggle, and others. Testing apps consisting of complex widgets follow the same pattern. With these skills, you can cover any Webix application with automated tests, integrate them into your CI/CD process, and reduce the number of bugs in production to a minimum.